Desserts
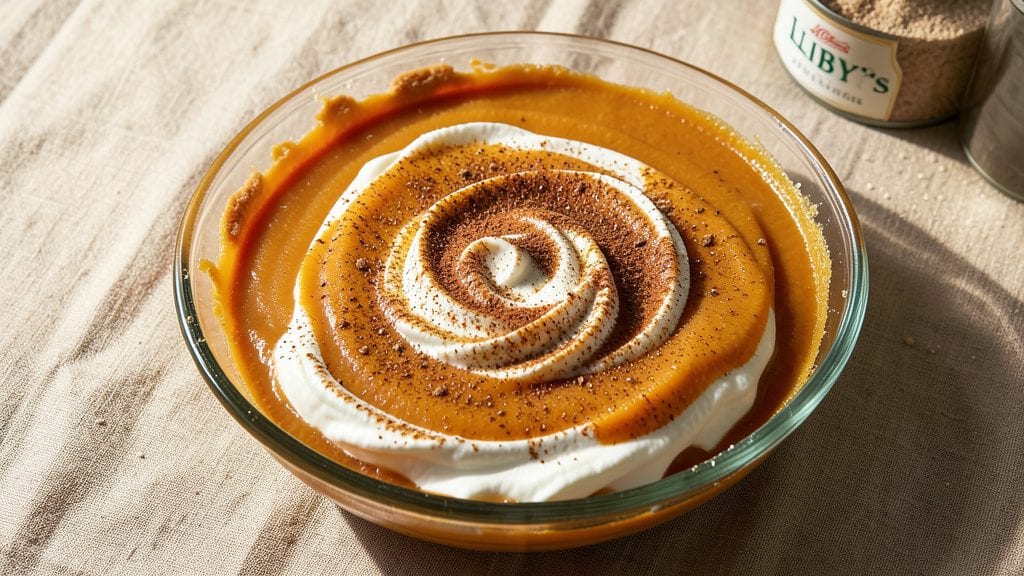
Libby's crustless pumpkin pie delivers all the classic flavors without the fuss of pie crust—smooth, spiced perfection in every bite. I perfected this recipe after years of testing, ensuring the filling stays silky and the texture holds up without a soggy bottom.
The secret lies in precise ingredient ratios and a baking technique that guarantees a clean slice every time.
This version uses canned pumpkin for convenience without sacrificing depth, with warm spices like cinnamon, nutmeg, and ginger that create that signature autumnal warmth.
The filling thickens beautifully without needing a crust to support it, thanks to a perfect balance of cornstarch and eggs that creates structure while maintaining that velvety texture. Ready in just 50 minutes, this pie is ideal for holidays or spontaneous dessert cravings.
What you'll end up with is a pie that looks elegant but requires no crust work—smooth, golden filling with a gentle wobble in the center when fresh from the oven.
The aroma alone will fill your kitchen with the scent of fall, while the flavor delivers that perfect balance of sweet and spiced. It's the kind of dessert that feels special without requiring hours of prep.
Serve it warm with whipped cream or let it chill for a firmer texture—either way, the flavor stays rich and satisfying. This recipe is designed to impress while keeping things simple, making it perfect for both beginners and experienced bakers. Let's get baking!
Ingredients for libby's crustless pumpkin pie
Six simple ingredients transform into that dreamy Libby's crustless pie everyone loves.
| Ingredient | Amount | Notes |
|---|---|---|
| Canned Pumpkin Puree 🎃 | 15 oz | Libby's brand, unsweetened |
| Large Eggs 🥚 | 4 whole | Room temperature for best mixing |
| Granulated Sugar 🍚 | 1 ½ cups | White or light brown |
| Cornstarch 🌾 | ½ cup | For silky texture |
| Ground Cinnamon 🌿 | 2 tsp | Freshly ground preferred |
| Ground Nutmeg 🌿 | ½ tsp | Freshly grated if possible |
| Ground Ginger 🌶️ | 1 tsp | For warm spice kick |
| Ground Cloves 🌶️ | ¼ tsp | Just a pinch, trust me |
| Salt 🧂 | ½ tsp | Kosher or sea salt |
| Heavy Whipping Cream 🥛 | 1 cup | Full-fat for richness |
| Unsalted Butter 🧈 | ½ cup | Cold, cubed for topping |
| Vanilla Extract 🍯 | 1 tsp | Pure vanilla preferred |
The pumpkin puree is non-negotiable—Libby's unsweetened is the gold standard here. Grab the 15-ounce can, not the pie filling (that's got sugar added). For spices, Penzeys or bulk bins at Whole Foods have the freshest ground cinnamon and nutmeg, but your regular grocery store spices work fine if they're not ancient. That said, if your nutmeg smells like dust, toss it. The cream and butter should be full-fat, cold, and from a trusted brand—none of that ultra-pasteurized stuff that separates. And vanilla? Pure, not imitation—the difference is night and day.
No cornstarch? Arrowroot powder at the same amount works in a pinch, but cornstarch is what gives this pie its signature silky texture. Short on eggs? Add an extra 1 tbsp of cornstarch to compensate for binding. The spices can be adjusted—half the cloves if you're sensitive to that peppery kick. Want extra depth? Add a pinch of cardamom. And if you're using brown sugar, reduce the sugar by 1 tbsp since it's already got molasses. The butter topping? Don't skip it—it's what gives that golden crust look without actual crust work.
This pie is best served the day it's made—warm with whipped cream is the ultimate. But if you must refrigerate, it keeps for 3 days in an airtight container. For make-ahead baking, assemble the pie the night before and bake in the morning. The texture actually improves after chilling. Freezes beautifully too—3 months max—just thaw overnight in the fridge. And if you're worried about the top browning too fast, tent it with foil after 20 minutes in the oven.
Why You'll Love This Recipe
- I’ll be real: this recipe uses stuff I always have—canned pumpkin, eggs, sugar—and still feels special. Leftovers? No problem. It keeps well in the fridge, and reheating a slice is faster than making toast. Budget-friendly, but it doesn’t taste cheap.
- No Crust, No Stress: Honestly, the crustless twist is a lifesaver—no rolling, no baking, just a smooth, velvety filling that’s ready in one bowl. The cornstarch thickens it just right, so it’s never gummy or watery, and that cinnamon? It’s like autumn in every bite without the fuss.
- Spice-Perfect Balance: Here’s what sold me—the way the cinnamon and sugar marry with the pumpkin makes it taste richer than it has any right to. The eggs give it that silky texture, so it’s creamy but still light, not heavy like some pies I’ve tried.
- Potluck Hero: Between us, this is my go-to for gatherings because it’s foolproof and always a hit. No one ever asks if it’s homemade—they just keep reaching for seconds. Plus, it’s the only pie that doesn’t need a side dish (though I won’t stop you if you bring one).
Step-by-step instructions for Libby's crustless pumpkin pie
Here's how to create that dreamy, silky pumpkin filling that's so rich and spiced it makes crust optional.
Whisk Wet Ingredients Until Silky Smooth
In a large mixing bowl, combine the 15 oz canned pumpkin puree, 1.5 cups granulated sugar, 1 cup heavy whipping cream, and 1 tsp vanilla extract. The pumpkin should be smooth with no lumps—if you notice any, give it a quick stir with a whisk to break them up. This is your flavor foundation, so don't rush this step.
Next, add the 4 whole large eggs one at a time, whisking vigorously after each addition. The mixture will thicken slightly as you incorporate each egg. I like to use a hand mixer here for about 30 seconds—just until everything is fully combined and smooth. The goal is to create a velvety batter that coats the back of a spoon without being gluey.
Blend Dry Ingredients for Perfect Texture
In a separate bowl, sift together the 0.5 cup cornstarch, 2 tsp ground cinnamon, 0.5 tsp ground nutmeg, 1 tsp ground ginger, 0.25 tsp ground cloves, and 0.5 tsp salt. This dry blend is what transforms your pie from good to extraordinary—it creates that signature silky texture while amplifying the warm spice flavors. Give it a quick whisk to ensure all the spices are evenly distributed.
Now, gradually whisk the dry ingredients into the wet mixture in small batches. Start with about ¼ cup at a time, whisking constantly to prevent lumps from forming. Once fully incorporated, the batter should be smooth and slightly thickened—like a cross between pudding and cake batter. If you're worried about lumps, strain the mixture through a fine-mesh sieve for an ultra-smooth finish.
Prepare the Baking Dish for Perfect Results
Preheat your oven to 350°F. While it heats, choose a 9-inch pie dish—glass or ceramic works best for even baking. Lightly grease the dish with butter or cooking spray, then sprinkle a thin layer of cornmeal or flour on the bottom. This prevents sticking and helps create a clean release when serving. I like to use a pastry brush to apply the grease evenly.
Pour the pumpkin mixture into the prepared dish, spreading it out evenly with a spatula. The batter should fill the dish about ¾ full—this gives it room to rise slightly while baking. For that classic pumpkin pie look, I like to swirl the top lightly with a knife, creating subtle patterns that make it look even more impressive when served.
Bake to Golden Perfection with Creamy Topping
Place the pie dish on the center rack of your preheated oven and bake for 50-55 minutes. The edges should be set but the center should still have a slight wobble—this indicates it's perfectly cooked through. You'll know it's ready when the top is golden brown and the filling has just started to pull away slightly from the edges of the pan.
While the pie bakes, prepare the topping by cutting the 0.5 cup unsalted butter into small cubes. Once the pie has baked for 45 minutes, remove it from the oven and sprinkle the butter cubes evenly over the top. Return it to the oven for the final 5-10 minutes of baking. This creates that beautiful, caramelized butter crust on top that everyone loves.
Rest and Serve for Maximum Richness
Remove the pie from the oven and let it cool completely at room temperature for at least 2 hours. This resting period is crucial—it allows the filling to set properly and develop its signature silky texture. If you can wait 4 hours or even overnight, the flavors will meld even more beautifully. The longer it rests, the richer and more luxurious the pie will taste.
Once cooled, run a thin knife around the edges to loosen it from the dish. Serve slices warm or at room temperature, and watch as your guests are completely wowed by this restaurant-quality pumpkin pie—all without the fuss of a crust. The secret is in that perfect balance of spices and the silky-smooth texture that only comes from proper resting. Enjoy every last bite!
Pro Tips For Making Libby'S Crustless Pumpkin Pie
- Whisk Eggs Cold: Crack eggs straight into the pumpkin mixture while it’s still cool—hot liquid scrambles them faster than you can whisk. I learned this the hard way after ending up with a lumpy batch that looked like it had been beaten with a hammer.
- Sift That Cinnamon: Measure cinnamon by weight if possible, but if you’re scooping, sift it directly into the dry ingredients. Clumps hide in the mix and turn your pie into a game of “find the spice.” (Yes, even if you think you’re measuring carefully.)
- Bake Until Slightly Under: Pull the pie out when the center still jiggles like Jell-O—it’ll firm up as it cools. Overbaking turns it into a sad, dense brick. I used to stress about doneness, then realized the recipe’s magic is in that wobbly finish.
- Preheat Oven to 375°F: Skip the “preheat” step at your peril—this pie relies on even heat distribution. A cold oven means a center that stays doughy while the edges brown too fast. (And no, “close enough” doesn’t count.)
Essential equipment for great libby's crustless pumpkin pie
Pie Dish Essentials
For this recipe, a 9-inch glass or ceramic pie dish is ideal—glass distributes heat evenly, while ceramic adds subtle richness to the flavor. I recommend Pyrex Standard 9x2-inch for its durability and heat resistance.
Avoid dark-colored dishes, as they can cause uneven baking and over-browning. If you only have a metal dish, choose one with a thick base to prevent burning. 🎃
Mixing Tools
You'll need a large mixing bowl (at least 8 cups) for combining ingredients, plus a hand mixer or whisk to achieve that silky-smooth texture. I use a KitchenAid 5-speed hand mixer for efficiency, but a sturdy whisk works too.
A fine-mesh sieve is optional but helpful for eliminating any lumps in the batter. For measuring, a liquid measuring cup and dry measuring cups ensure precision with your wet and dry ingredients.
Baking Gear
A digital oven thermometer is worth the investment—it ensures your oven is truly at 350°F, as home ovens can vary by 25°F or more. I love the Thermoworks Oven Thermometer for its accuracy.
For the butter topping, a sharp chef's knife and cutting board are essential for creating even cubes. A spatula or offset spatula helps spread the batter evenly in the dish without tearing.
Cooling & Serving
After baking, let the pie cool in its dish on a wire rack to prevent condensation from making the bottom soggy. A pie server or sharp knife makes clean slices possible—look for one with a serrated edge to prevent crushing the filling.
For presentation, I use a white ceramic plate to make the golden butter topping stand out beautifully. A pastry brush comes in handy for lightly greasing the dish before baking.
Optional Upgrades
For a restaurant-quality finish, consider a pie cooling rack insert that fits inside your dish—it prevents sogginess while cooling. A pie crust shield (like the Wilton Pie Crust Shield) helps create that caramelized butter crust without over-browning.
If you love garnishes, a small offset spatula lets you add whipped cream or a sprinkle of cinnamon right before serving. These extras elevate the presentation without changing the recipe's core simplicity. ✨
Nutrition facts
Frequently asked questions
Why does this crustless pumpkin pie stay firm without a crust?
The secret is in the cornstarch-egg ratio and proper baking technique. The ½ cup cornstarch creates a natural thickening agent that sets the filling, while the 4 eggs provide structure. Baking at 350°F for 50-55 minutes ensures even cooking without over-baking. The butter topping also helps create a golden barrier that prevents collapse.
Can I use fresh pumpkin instead of canned?
Yes, but you'll need to adjust the moisture. Puree 3 cups fresh pumpkin (about 1 large pumpkin) until smooth, then strain to remove excess liquid. Reduce the heavy cream to ½ cup since fresh pumpkin is wetter. For best results, roast the pumpkin first to concentrate flavors.
What if my pie filling looks watery before baking?
This usually means the batter needs more thickening. Whisk in 1-2 tbsp additional cornstarch mixed with 1 tbsp cold water until smooth, then return to the oven. If it's still too thin after baking, the oven may be too hot—check with an oven thermometer. The center should have a slight wobble when done.
How do I make this gluten-free?
Replace the ½ cup cornstarch with ½ cup gluten-free all-purpose flour blend**> (like Bob's Red Mill 1:1). Check that all spices are certified gluten-free, and use a certified GF pie dish. The texture will be slightly different but still delicious. Always test with a small batch first.
Can I bake this in a springform pan instead?
Yes, but reduce baking time by 5-10 minutes—springform pans conduct heat differently. Line the bottom with parchment paper for easy release. The filling may set slightly faster, so check for doneness at 45 minutes. The butter topping works the same way.