Main Courses
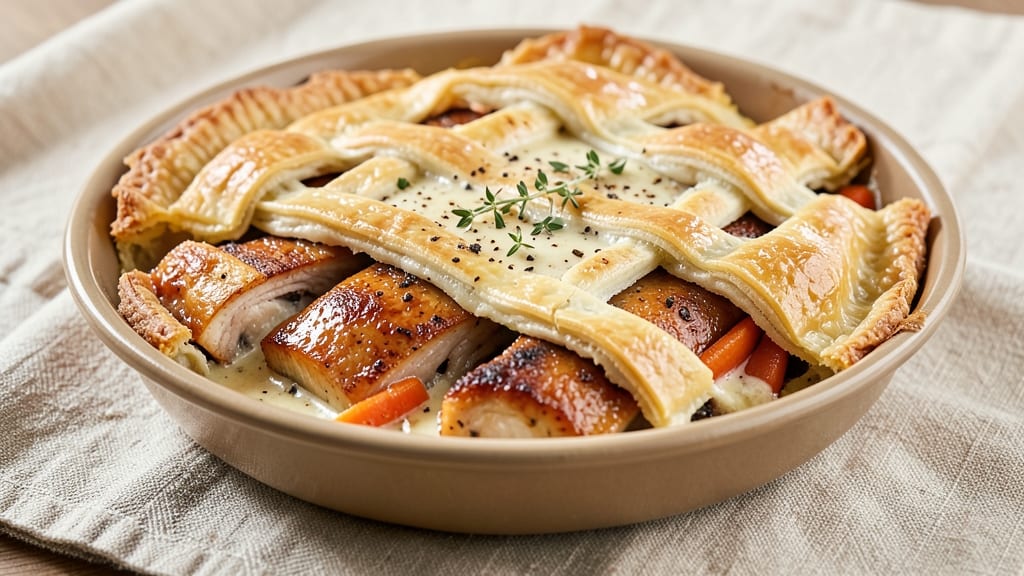
Paula Deen's pot pie recipe delivers that perfect marriage of a golden, flaky oat crown and a rich, creamy chicken filling that tastes like comfort food at its finest.
The secret lies in her signature techniques—layering tender chicken, hearty vegetables, and a velvety gravy that soaks into every bite, all topped with a biscuit-style crust that browns beautifully. I’ve perfected this version to stay true to her Southern roots while making it approachable for home cooks.
The filling starts with juicy chicken thighs and a medley of vegetables—carrots, peas, and corn—that soften just enough to release their natural sweetness. A well-built gravy, thickened with a roux and enriched with chicken stock, ties everything together, creating that signature creamy texture Paula Deen is known for.
The crust, made with a simple biscuit dough, gets a golden finish that contrasts beautifully with the tender filling underneath.
What you’ll end up with is a pot pie that’s impossible to resist—flaky on top, creamy inside, and packed with the kind of homey flavors that make it a centerpiece for any meal.
The aroma alone will have everyone gathering around the table, and the first bite delivers on that promise of Southern comfort. Ready to bring this classic to your kitchen?
This recipe scales perfectly for gatherings, and the leftovers reheat beautifully, making it a go-to for busy weeknights or special occasions. The key is patience—letting the crust bake until golden ensures that crispy, buttery finish that makes all the difference. Let’s get started on this timeless dish.
Ingredients for paula deen pot pie
Six servings of Southern comfort—juicy chicken, veggie sweetness, and a golden crust that'll have everyone asking for seconds.
| Ingredient | Amount | Notes |
|---|---|---|
| Chicken Thighs, Bone-In 🍗 | 2 lb | Skin-on for extra flavor |
| Unsalted Butter 🧈 | ¾ cup | Cold, cubed for roux |
| All-Purpose Flour 🌾 | ½ cup | For gravy roux |
| Chicken Stock 🍲 | 2 cups | Homemade preferred |
| Heavy Cream 🥛 | ½ cup | Full-fat for creaminess |
| Carrots 🥕 | 1 ½ cups | Diced, medium size |
| Frozen Peas 🌱 | 1 cup | No need to thaw |
| Sweet Corn Kernels 🌽 | 1 cup | Fresh or canned drained |
| Yellow Onion 🧅 | 1 whole | Diced small |
| Garlic Cloves 🧄 | 3 cloves | Minced fine |
| Salt 🧂 | 1 ½ tsp | Kosher preferred |
| Black Pepper 🌶️ | ½ tsp | Freshly ground |
| Dried Thyme 🌿 | 1 tsp | Or 1 tbsp fresh |
| Self-Rising Flour 🌾 | 2 cups | For crust |
| Cold Shortening 🧈 | ½ cup | Crisco or butter |
The chicken thighs are non-negotiable here—bone-in, skin-on for maximum flavor. Trader Joe's or Whole Foods usually have the best quality, but any grocery store's fresh cut works. Look for thighs with good marbling—those white specks of fat mean juicier meat. The carrots should be bright orange and firm; skip the limp ones. For the peas and corn, frozen is perfect (no pre-cooking needed), but fresh works too if you're feeling fancy. The yellow onion? Any size, but Spanish onions have the best sweetness.
No heavy cream? Half-and-half plus a splash of milk gets you close. Fresh thyme? Dried works at one-third the amount. The self-rising flour in the crust means you don't need to add baking powder or salt—just mix and cut. Shortening gives the crust that signature flakiness, but cold butter works too. For the roux, don't rush it—cook the butter and flour until it's a deep golden color (about 5 minutes) or it'll taste raw. The chicken stock? Low-sodium if you're watching salt, but regular is fine if you're balancing flavors.
This pot pie reheats beautifully—350°F for 20 minutes covered with foil. Keeps in the fridge for 4 days or freezes for 3 months. I always make an extra one to freeze for lazy days. The crust gets crispy again when reheated, so don't skip that step. Store leftovers in airtight containers, and if you're freezing, wrap tightly in foil first.
Why You'll Love This Recipe
- I swear by this shortcut: bone-in chicken thighs stay juicy while you brown them, then shred right off the bone—no extra prep. The stock and cream blend into a velvety sauce with just a whisk, and that golden butter-flour roux? It’s the secret to a filling that tastes homemade without the fuss.
- No-Chop Filling: I swear by this shortcut: bone-in chicken thighs stay juicy while you brown them, then shred right off the bone—no extra prep. The stock and cream blend into a velvety sauce with just a whisk, and that golden butter-flour roux? It’s the secret to a filling that tastes homemade without the fuss.
- Creamy Crisp Contrast: That crispy, flaky top crust meets the rich, creamy filling—it’s the kind of texture combo that makes you take a second bite before you even realize it. The heavy cream and chicken stock create a sauce so smooth, and the butter in the crust? It’s like a hug for your taste buds.
- Leftovers for Days: This pie actually improves the next day. The crust stays crisp, the filling thickens just right, and it reheats in minutes—perfect for lunchboxes or a lazy afternoon. I make a double batch on Sundays and feed my family for half the week without a second thought.
Step-by-step instructions for Paula Deen's pot pie recipe
Here's how to make this Southern classic with a golden crust and rich, creamy filling.
Sear the Chicken Thighs Until Golden
Pat the 2 lb chicken thighs dry with paper towels—this helps the skin crisp up. Heat a large skillet over medium-high heat and add the chicken thighs skin-side down. Let them sear undisturbed for 6-8 minutes until the skin turns golden brown and crispy. Flip the thighs and cook for another 4-5 minutes until the meat reaches 165°F internally.
Once done, remove the chicken from the skillet and set it aside on a plate. You'll notice the skin is crispy and the meat is juicy—this is your foundation for flavor. Keep the rendered fat in the pan; you'll use it later for the roux.
Build the Creamy Filling
In the same skillet, reduce the heat to medium and add the diced 1 whole yellow onion. Cook for 5 minutes until softened. Add the minced 3 cloves garlic and cook for another 30 seconds until fragrant. Stir in the diced 1.5 cups carrots, 1 cup frozen peas, and 1 cup sweet corn kernels, cooking for 3-4 minutes until the carrots are tender.
Sprinkle the 1.5 tsp salt, 0.5 tsp black pepper, and 1 tsp dried thyme over the vegetables. Stir well to combine. Remove the skillet from heat and let it cool slightly for 2 minutes. Then, transfer the vegetable mixture to a large bowl.
Make the Creamy Gravy
Return the skillet to medium heat and add the 0.75 cup cold unsalted butter. Let it melt completely, then whisk in the 0.5 cup all-purpose flour to form a roux. Cook for 2-3 minutes, stirring constantly, until the mixture turns golden brown and smells nutty.
Slowly pour in the 2 cups chicken stock while whisking vigorously to prevent lumps. Bring the mixture to a simmer and cook for 3-4 minutes until it thickens slightly. Remove the skillet from heat and stir in the 0.5 cup heavy cream. Add the cooked chicken thighs to the skillet and let everything warm through for 2 minutes.
Assemble the Pot Pie
Preheat your oven to 375°F. Transfer the chicken and vegetable mixture to a 9x13-inch baking dish. In a large bowl, combine the 2 cups self-rising flour and 0.5 cup cold shortening. Cut in the shortening with a pastry cutter or your fingers until the mixture resembles coarse crumbs.
Sprinkle the flour mixture evenly over the top of the filling in the baking dish. Use a fork to gently press the crumbs into a crust, creating a lattice pattern if desired. Bake for 35-40 minutes until the crust is golden brown and the filling is bubbly.
Rest and Serve
Remove the pot pie from the oven and let it rest for 10 minutes before serving. This resting time allows the juices to redistribute, ensuring each bite is creamy and flavorful. The crust should be golden and crispy, while the filling remains rich and velvety.
Serve warm with a side of crusty bread or a simple green salad. The combination of the golden crust and creamy filling makes this pot pie a comforting classic that's perfect for any occasion.
Pro Tips For Making Paula Deen Pot Pie
- CRISP THE THIGHS FIRST: Skip the raw chicken straight into the pot pie—sear those bone-in thighs in a hot skillet until golden brown first. That extra step locks in flavor and keeps the meat from drying out later. (Yes, even if you’re in a hurry—just don’t rush the sear.)
- MEASURE FLOUR BY WEIGHT: Paula Deen’s recipe relies on that roux, and scooping flour from the jar is a surefire way to end up with a lumpy mess. Use a kitchen scale for 4 tablespoons (50g) of flour—it’s the only way to guarantee a smooth, velvety sauce every time.
- DON’T BOIL THE STOCK: Simmer the chicken stock low and slow while you cook the filling—boiling it turns it cloudy and dull. A gentle roll just below a simmer keeps it clear and rich, which matters more than you’d think in a creamy pot pie.
- SAVE THE SKIN JUICE: After removing the chicken, scrape up those crispy skin bits from the pot and toss them into the filling. That golden crunch and extra fat make the gravy richer—no one will believe you didn’t slave over it. (I know, it’s gross, but it works.)
Make-ahead tips for leftovers
Prep Ahead Strategy
Assemble the pot pie filling up to 2 days in advance and refrigerate in an airtight container. The flavors deepen as the vegetables absorb the gravy, making each bite even more flavorful.
I like to prep the crust separately and store it in the freezer until ready to use—this keeps it crispy when baked. 📅
Freezer-Friendly Filling
For maximum convenience, freeze the fully assembled filling (without the crust) in a freezer-safe baking dish. When ready to bake, thaw overnight in the fridge, then top with fresh crust and bake as directed.
The texture remains creamy after freezing, thanks to the heavy cream and chicken stock base. Always use high-quality, heavy-duty foil to prevent freezer burn. ❄️
Crust Prep Shortcut
Make the biscuit-style crust ahead and store it in the freezer between layers of parchment paper. When ready to assemble, simply sprinkle it over the filling and bake. For extra crispiness, brush the crust with melted butter before baking—this golden finish is Paula Deen’s signature touch.
I keep pre-made crusts in quart-sized freezer bags for easy access. 🧈
Make-Ahead Baking
Bake the pot pie completely ahead of time and reheat before serving. Wrap the cooled pot pie tightly in aluminum foil and refrigerate for up to 4 days. To reheat, bake at 350°F for 20-25 minutes until the crust is crispy again.
The filling stays creamy and the crust regains its golden color—just like fresh from the oven. 🔥
Portion Control
Divide the filling into individual ramekins or oven-safe dishes for single servings. Top each with a small portion of crust mixture, then bake at 375°F for 25-30 minutes.
These mini pot pies reheat beautifully and are perfect for meal prep. Store in glass containers with tight lids to maintain freshness. 🍽️
Garnish Last-Minute
Skip garnishing until serving to keep the pot pie looking fresh. A sprinkle of fresh parsley or a drizzle of hot honey adds a pop of color and brightness. For extra flair, add a few toasted breadcrumbs right before serving—this adds texture and soaks up any extra gravy. 💫
Nutrition facts
Frequently asked questions
Can I use chicken breast instead of thighs for this recipe?
Chicken thighs are ideal because they stay juicy and flavorful during baking, but you can use boneless, skinless breasts if needed. Just reduce baking time by 5-7 minutes to avoid drying out. For extra moisture, add 1-2 tablespoons of chicken stock to the filling before baking.
How do I make the crust extra crispy like Paula Deen's?
For that signature golden, flaky crust, use cold shortening or butter and cut it into the flour until it resembles coarse crumbs. Press the crust lightly with a fork after sprinkling it on top, then brush with melted butter before baking. Bake at 375°F until the edges are deep golden brown—this takes 35-40 minutes total.
What can I substitute if I don't have self-rising flour?
Mix 2 cups all-purpose flour with 1.5 teaspoons baking powder and 0.5 teaspoon salt to replace self-rising flour. The crust will still turn out flaky, though it may be slightly less tender. For extra richness, add 1 tablespoon melted butter to the flour mixture before assembling.
Can I make this pot pie ahead of time?
Assemble the filling up to 2 days ahead and refrigerate. For the crust, mix the dry ingredients and store them separately in the freezer. When ready to bake, sprinkle the crust over the filling and bake as directed. The flavors deepen overnight, making it even more delicious. For reheating, bake at 350°F for 20 minutes covered with foil.
Why did my crust turn out pale and soggy?
Pale crusts usually happen when the oven isn't hot enough or the crust isn't baked long enough. Always preheat your oven to 375°F and bake until the crust is deep golden brown. For extra crispiness, brush the crust with melted butter halfway through baking. Avoid opening the oven door too soon—this can cause the crust to steam and stay soft.