Desserts
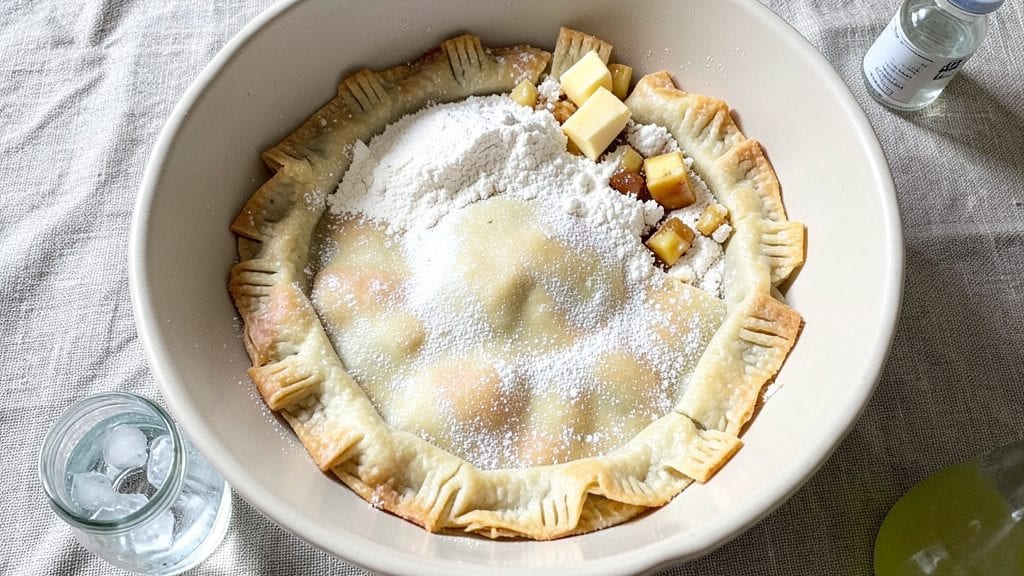
Barefoot Contessa's pie crust recipe delivers the perfect balance of flaky layers and buttery richness that makes every slice worth savoring. This isn't just any crust—it's the foundation for pies that shatter with each bite, whether you're baking classic apple pie or a savory quiche.
The secret lies in cutting cold butter into flour until it resembles coarse crumbs, then chilling the dough to lock in those delicate layers. I've perfected this technique over years of baking, and it never fails to impress.
The beauty of this recipe is its versatility—use it for sweet pies, tarts, or even savory hand pies, all while keeping the process simple. With just five ingredients (flour, butter, salt, ice water, and a pinch of vinegar), you'll create a crust that's foolproof and restaurant-quality.
The key is patience: letting the dough rest in the fridge ensures it rolls out smoothly and fits perfectly into any pie pan without cracking. This is the kind of crust that transforms ordinary desserts into showstoppers.
What you'll achieve is a golden-brown, flaky crust with layers so delicate they practically dissolve on your tongue. The lattice design adds visual appeal while keeping the filling moist, and the buttery flavor enhances whatever you fill it with—whether it's spiced apples, creamy custard, or hearty vegetables.
This crust is the difference between a good pie and a great one, and it's easier to make than you might think.
Once you master this recipe, you'll never go back to store-bought crust again. The process is straightforward, but the results are anything but ordinary. Let's get started on creating the perfect foundation for your next baking masterpiece.
Ingredients for barefoot contessa pie crust
Five simple ingredients transform into the flakiest, most buttery crust you'll ever make.
| Ingredient | Amount | Notes |
|---|---|---|
| All-Purpose Flour 🌾 | 2 ½ cups | Sifted for light texture |
| Unsalted Butter 🧈 | 1 cup | Cold, cubed, European preferred |
| Diamond Crystal Kosher Salt 🧂 | ½ tsp | Fine grain preferred |
| Ice Water ❄️ | ⅓ cup | Actually ice cubes |
| White Vinegar 🍶 | 1 tbsp | For tenderizing flour |
The butter is non-negotiable here—European-style butter with higher fat content (82-86%) gives those signature flaky layers. Plugrá or Kerrygold are my go-tos, but any good unsalted butter works. Keep it cold when cutting into the flour—pop the butter cubes in the freezer 15 minutes beforehand if your kitchen gets warm. The flour should resemble coarse crumbs after mixing, almost like wet sand. King Arthur or Gold Medal flours work best for this texture. And don't skip sifting—it prevents dense spots in your crust.
No ice water? Freeze water in an ice cube tray—it melts slower and keeps the dough colder longer. Short on vinegar? Lemon juice at half the amount works in a pinch, but it adds a slight tang. The salt matters too—Diamond Crystal is less salty than Morton, so if you only have Morton, use half the amount. For a vegan version, use vegan butter and coconut oil (keep it cold!)—the crust will be slightly less flaky but still delicious. And if you're worried about the dough being too sticky, add 1 tbsp more flour but don't overdo it.
This dough needs at least 2 hours in the fridge—don't rush it. Wrap tightly in plastic wrap or a damp towel to prevent drying. It keeps for up to 3 days in the fridge or 3 months in the freezer. For freezing, flatten into a disk, wrap tightly, and thaw overnight in the fridge. Once rolled out, work quickly—keep the dough between two sheets of parchment to prevent sticking. The lattice design? Use a ruler and knife for clean cuts—it's worth the extra minute.
Why You'll Love This Recipe
- No-Fuss Technique: I swear by the ice water trick—just tossing cubes into the flour mix while cutting butter makes it so much easier. No food processor, no stress, and zero guesswork about texture.
- Butter Love: Cold, cubed butter folded into the flour with a fork? That’s the secret. The result is flaky layers so crisp they’d make a bakery jealous, and the vinegar keeps it from getting gummy.
- Weeknight Flex: This crust works for anything—savory galettes, sweet tarts, or even a quick quiche. Honestly, I’ve used it for Thanksgiving leftovers and Sunday brunch, and it never lets me down.
- Budget Magic: A single batch costs pennies but feels like a restaurant-quality treat. Plus, it keeps well in the fridge for days, so I make one and stretch it across meals without breaking the bank.
Step-by-step instructions for Barefoot Contessa's pie crust recipe
Here's how to create that legendary flaky, buttery lattice crust that makes every slice worth it.
Cut and Mix the Cold Butter and Flour
Place the 1 cup unsalted butter in a large bowl and cut it into ¼-inch cubes using a sharp knife. This cold butter is the secret to flaky layers—don't skip this step. Add the 2.5 cups all-purpose flour and the 0.5 teaspoon diamond crystal kosher salt to the bowl. Use two knives or a pastry cutter to work the butter into the flour until you have pea-sized crumbs with some larger butter pieces remaining.
I like to press the butter pieces against the flour with my fingers to break them down gradually. This ensures even distribution and prevents a tough crust. You're aiming for a texture that's roughly crumbly but still has visible butter pieces—this creates those signature flaky layers when baked.
Add Vinegar and Ice Water Gradually
Make a well in the center of the flour mixture and pour in the 1 tablespoon white vinegar and 0.33 cup ice water. The vinegar helps tenderize the flour while the ice water keeps the butter cold longer. Using a fork, gently stir the mixture until it just comes together—don't overmix or the crust will be tough.
If the dough feels dry, add 1 teaspoon ice water at a time until it holds together when pressed. The dough should be moist but not sticky. I press it between my fingers to check—it should hold its shape without crumbling. Wrap the dough tightly in plastic wrap and refrigerate for at least 1 hour (up to 2 days). This resting time relaxes the gluten and makes rolling easier.
Roll Out the Dough for Your Crust
On a lightly floured surface, roll out half of the chilled dough into a 12-inch circle about ⅛-inch thick. I use a rolling pin and keep rotating the dough to maintain even thickness. If it cracks, gently press it back together—don't force it. Transfer the rolled-out dough to a 9-inch pie dish and trim the edges, leaving about ½-inch overhang. Fold the overhang under to create a neat edge.
Repeat with the remaining dough. For a lattice top, roll out the second piece into a 12-inch by 8-inch rectangle (about ⅛-inch thick). This will give you enough dough to create those beautiful diamond patterns. Keep both dough pieces covered with a clean towel while you work to prevent drying.
Create the Signature Lattice Top
Cut the 8-inch rectangle of dough into 12 strips about 1-inch wide each. I use a sharp knife and a ruler to keep them even. Starting with one strip along the bottom edge of the pie, place a second strip perpendicular to it, overlapping by ½-inch. Press the edges together firmly to seal.
Continue building the lattice pattern by alternating strips vertically and horizontally, overlapping each by ½-inch and sealing the edges. The last strip should be placed horizontally at the top. Trim any excess dough and press the edges of the lattice against the bottom crust to seal completely. Use a fork to crimp the edges decoratively if desired.
Blind-Bake for Perfect Support
Preheat your oven to 375°F. Place a sheet of parchment paper over the lattice crust and fill it completely with dried beans or pie weights. This prevents the top from puffing up. Bake for 15 minutes, then remove the weights and parchment. Continue baking for another 10-12 minutes until the crust is golden brown and completely set.
For a deeper color, you can brush the baked crust with a little melted butter before adding your filling. The crust should be firm enough to support your filling without collapsing. Let it cool slightly before filling—this prevents soggy bottoms. The result will be a crisp, shatteringly flaky lattice that holds its shape perfectly through baking.
Pro Tips For Making Barefoot Contessa Pie Crust
- CHILL THE BUTTER FIRST: The Barefoot Contessa recipe calls for cold butter, but not frozen—just firm. I learned this the hard way when I used butter straight from the fridge and ended up with a tough crust. Take the butter out of the fridge 15 minutes before mixing, especially if your kitchen runs warm. It should yield slightly when pressed but not melt like butter in summer.
- SALT THE FLOUR BEFORE MIXING: Sprinkle the kosher salt directly into the flour before cutting in the butter—this ensures even distribution without clumping. I used to add it later and always wondered why some spots tasted saltier than others. Diamond Crystal is lighter than table salt, so use the full 1 teaspoon (about 5 grams) as written, or your crust will taste bland.
- WORK FAST WITH ICE WATER: Keep your ice water ice cold—not just chilled. The Barefoot Contessa method relies on the water shocking the dough into flakes, which creates a tender, crumbly texture. If your water warms up mid-mix, the dough will stick together like glue. Use a metal bowl and swap out lukewarm water for fresh ice cubes halfway through if needed.
- PRESS, DON’T ROLL: Skip the rolling pin entirely. The Barefoot Contessa crust is designed to be pressed into the pan, which locks in flavor and prevents shrinking. Use your fingertips to gently press the dough into the pie dish, rotating the pan as you go—this gives you more control than rolling and results in an even, sturdy base. (Yes, it’ll look messy at first, but that’s how you know it’s working.)
Troubleshooting this dish
Dough Too Sticky
If your dough feels too sticky after adding ice water, resist the urge to add more flour—this will make it tough. Instead, chill the dough for an extra 30 minutes to firm it up.
I’ve also found that using less ice water (about 2 tbsp less) can help, especially in humid kitchens. Wrap the dough tightly in plastic wrap and press it flat against the counter before refrigerating to prevent sticking. 💡
Cracked or Torn Dough
Cracks often happen when rolling out warm dough. Let it rest for 10-15 minutes at room temperature before rolling, and keep it between two sheets of parchment paper to prevent sticking. If it tears, gently press the edges back together and patch with a tiny bit of extra dough.
For lattice tops, avoid over-handling—work quickly and use a sharp knife for clean cuts. 🔪
Pale or Soggy Crust
A pale crust usually means the butter melted too much during baking. Ensure your oven is fully preheated to 375°F and use a baking sheet on the lower rack to trap heat. For extra crispiness, blind-bake the crust for 5 minutes longer before adding filling.
If your crust still seems soggy, brush the bottom with a thin layer of egg wash (1 egg + 1 tbsp water) before baking. 🍳
Lattice Won’t Stay Together
Weak lattice strips often mean the dough wasn’t chilled enough. Roll out the strips ⅛-inch thick and press them firmly together at the overlaps. If the lattice sags, reinforce it by placing a few extra strips underneath for support.
For extra stability, bake the lattice separately for 5 minutes before assembling the pie. This trick works like a charm for heavy fillings like pumpkin or custard. ✨
Crust Shrinks in Oven
Shrinking happens when the dough isn’t properly chilled or the oven isn’t hot enough. Let the dough rest for the full 2 hours in the fridge and preheat the oven for at least 15 minutes.
If your crust still shrinks, try rolling it slightly thicker (⅛-inch instead of ⅛-inch) and use a pie dish with slightly higher sides. A 9-inch deep-dish pan works better than a standard 9-inch pan for stability. 🏋️
Butter Melts Too Fast
If your butter turns to liquid during mixing, your kitchen is likely too warm. Place the butter in the freezer for 15 minutes before cutting it into the flour, and work quickly when combining ingredients.
For extra insurance, use European-style butter (like Plugrá), which has a higher fat content and stays solid longer. If all else fails, switch to shortening** for a more stable fat—though it won’t be as flaky. 🧊
Nutrition facts
Frequently asked questions
Can I use this crust for savory pies like quiche?
This versatile crust works beautifully for both sweet and savory applications. For quiche or savory hand pies, brush the baked crust with a thin layer of melted butter before adding your filling to prevent sogginess. The buttery flavor actually enhances savory dishes like spinach and feta quiche or chicken pot pie.
Why does the recipe call for ice water instead of regular water?
The ice water keeps the butter cold longer during mixing, which is crucial for creating those signature flaky layers. Regular water would warm up too quickly, causing the butter to melt and create a tougher crust. Using ice cubes also helps maintain the proper dough consistency without making it too sticky.
Can I make this crust ahead of time?
Yes, this dough keeps exceptionally well! Wrap it tightly in plastic wrap and refrigerate for up to 2 days or freeze for 3 months. For freezing, flatten into a disk and thaw overnight in the fridge. The longer resting time actually improves the texture, making it easier to roll out and less prone to cracking.
What's the secret to getting that perfect lattice pattern?
Precision is key! Use a sharp knife and ruler to cut even 1-inch strips from the dough rectangle. Overlap each strip by exactly ½-inch and press firmly to seal. Work quickly to prevent the dough from warming up, which can make the lattice sag. For extra stability with heavy fillings, bake the lattice separately for 5 minutes before adding filling.
Can I substitute butter with another fat?
For the most authentic flavor and flakiness, stick with butter—but you can use vegan butter or even shortening in a pinch. If using shortening, expect slightly less flavor but better stability in warm kitchens. For a lighter texture, try coconut oil (keep it cold!) mixed with butter, though the flavor will differ slightly.