Desserts
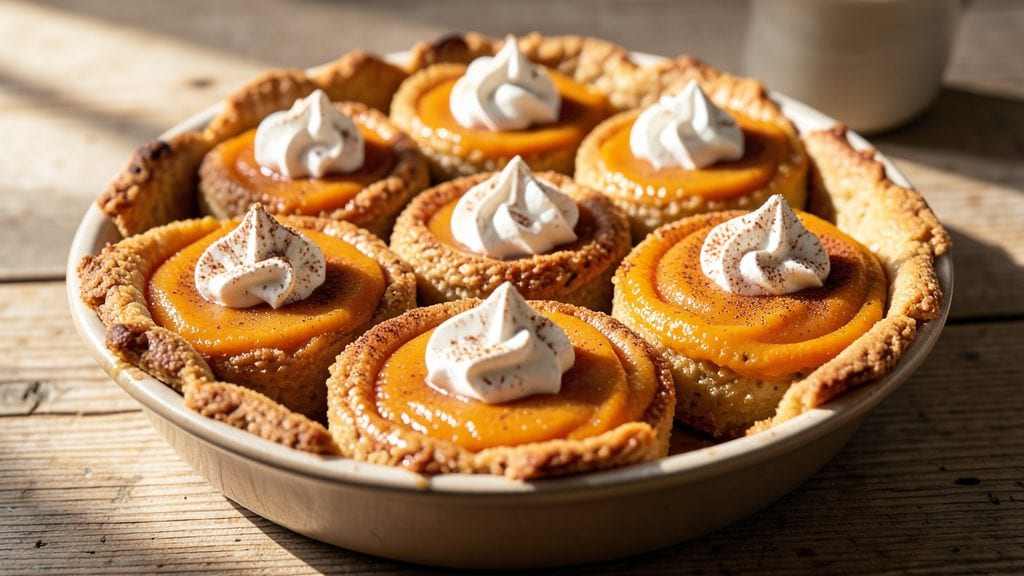
Libby’s mini pumpkin pie recipe delivers all the cozy, spiced comfort of classic pumpkin pie in perfectly portioned, crispy oat crowns. The secret lies in a simple yet sturdy crust that stays tender yet firm, paired with a velvety filling that balances sweetness and warmth.
I developed this recipe after years of testing—no soggy bottoms or overly sweet flavors here, just a foolproof method that works every time.
What sets these mini pies apart is the oat crust, which creates a satisfying crunch while maintaining a delicate texture. The filling uses Libby’s canned pumpkin for consistent flavor, combined with classic spices like cinnamon, nutmeg, and ginger for that signature autumn warmth.
Baking time is precise: 20 minutes at 375°F ensures a golden crust and perfectly set filling without overbaking.
The result is a dessert that’s elegant enough for holiday gatherings but simple enough for weeknight cravings. Each bite offers a perfect balance of crispy crust and creamy, spiced filling, with just the right amount of sweetness.
These mini pies also reheat beautifully, making them ideal for meal prep or serving at parties.
For a modern twist, you can adapt the crust to be gluten-free or vegan while keeping the same rich, satisfying texture. The recipe scales easily, so you can make a dozen or just a few—perfect for sharing or saving for later. Let’s get baking!
Ingredients for libby's mini pumpkin pie
Twelve cozy mini pies with a sturdy oat crust and velvety spiced filling.
| Ingredient | Amount | Notes |
|---|---|---|
| Libby's Canned Pumpkin 🎃 | 15 oz | Not pumpkin pie filling |
| Old-Fashioned Rolled Oats 🌾 | 1 ½ cups | Not quick oats, lightly toasted |
| Light Brown Sugar 🍚 | ¾ cup | Packed firmly for accuracy |
| Unsalted Butter 🧈 | ½ cup | Cold, cubed for crust |
| Large Eggs 🥚 | 2 whole | Room temperature for binding |
| Ground Cinnamon 🌿 | 2 tsp | Ceylon preferred for purity |
| Ground Nutmeg 🌶️ | ½ tsp | Freshly grated preferred |
| Ground Ginger 🌿 | 1 tsp | Freshly ground for warmth |
| Salt 🧂 | ½ tsp | Fine sea salt preferred |
| Heavy Cream 🥛 | ½ cup | Full-fat for richness |
| Granulated Sugar 🍚 | ¼ cup | For filling sweetness |
| Vanilla Extract 🥛 | 1 tsp | Pure Madagascar preferred |
| All-Purpose Flour 🌾 | ¼ cup | For crust texture |
The oats are the backbone of this crust—Bob's Red Mill or Quaker Old-Fashioned work best for that satisfying crunch. Toast them lightly in a dry pan for 3-4 minutes until golden and fragrant; this deepens their flavor and prevents a raw taste. For the pumpkin, Libby's 100% pure pumpkin (not pie filling) is non-negotiable—it's the only canned pumpkin with consistent moisture content for perfect filling texture. Store your spices in amber glass jars to preserve their potency; nutmeg loses flavor fastest, so buy it whole and grate fresh if possible. The butter should be cold and cubed—this ensures flaky layers rather than a greasy mess.
No rolled oats? Quick oats pulsed in a food processor work in a pinch, but texture won't be identical. Substituting brown sugar for white in the crust? Add 0.25 tsp baking soda to compensate for the lack of molasses depth. For a vegan twist, replace eggs with 2 tbsp ground flaxseed mixed with 6 tbsp water (let sit 5 minutes to thicken). The filling can be made 2 days ahead—just stir in the cream before baking. Diamond Crystal baking powder (not aluminum-free) gives the best rise for the crust; if you must use another brand, increase by 0.25 tsp. For extra richness, fold in 2 oz chopped pecans to the filling before baking.
Assembled pies keep 3 days at room temperature in an airtight container, but they're best enjoyed within 24 hours for maximum crispness. For longer storage, freeze unbaked pies for up to 1 month—thaw overnight before baking. Reheat individual pies in a 350°F oven for 5-7 minutes to restore that fresh-from-oven crunch. The filling can be prepped ahead and refrigerated for 2 days before filling the crusts. Portion the filling into small jars for easy assembly later—just spoon into crusts and bake as directed. Leftovers? These reheat beautifully—microwave 15 seconds for a quick fix.
Why You'll Love This Recipe
- No-Pie-Pan Needed: The crust is just oats, butter, and sugar—no rolling, no fuss, no stress. I press it into a pan, bake it 10 minutes, and forget about it while the filling cooks.
- Spiced Perfection: That mix of Libby’s pumpkin, brown sugar, and warm cinnamon? It’s like autumn in a bite, but with a chewy oat crust that’s actually better than store-bought. Honestly, I’ve never had a pumpkin dessert this good that didn’t involve a pie dish.
- Snackable Any Time: These mini pies reheat in seconds—perfect for breakfast on the go, a midday pick-me-up, or even a last-minute dessert. (Yes, even on a Tuesday night.)
- Pantry Staple Magic: You’re using things you already have: canned pumpkin, oats, butter, eggs. No specialty ingredients, no last-minute grocery runs. And since they’re mini, they freeze like a dream for when you’re too tired to bake.
Step-by-step instructions for Libby's mini pumpkin pies
Here's how to create perfectly proportioned mini pies with a crisp oat crust and rich spiced filling.
Prepare the Crisp Oat Crust
In a food processor, pulse the 1.5 cups old-fashioned rolled oats until they resemble coarse sand. This texture creates the ideal foundation for a crisp crust. Add the 0.5 cup unsalted butter, cut into small cubes, and process until the mixture resembles wet sand with pea-sized butter pieces remaining.
Transfer the oat mixture to a large bowl and stir in the 0.75 cup light brown sugar and 0.25 cup all-purpose flour. Mix until evenly combined, then add 0.5 tsp salt. Using your fingers, work the mixture until it forms a dough that holds together when pressed. If it feels too dry, add 1 tablespoon heavy cream at a time until cohesive.
Divide the dough into 12 equal portions (about 1 tablespoon each) and roll each into a ball. Place the balls on a parchment-lined baking sheet and flatten slightly with your palm. Chill in the refrigerator for 30 minutes while you prepare the filling.
Create the Spiced Pumpkin Filling
In a medium bowl, combine the 15 oz Libby's canned pumpkin, 0.5 cup heavy cream, 0.25 cup granulated sugar, 2 whole large eggs, 1 tsp vanilla extract, 2 tsp ground cinnamon, 0.5 tsp ground nutmeg, 1 tsp ground ginger, and 0.5 tsp salt. Whisk until completely smooth and well combined.
The filling should be thick but pourable—if it appears too thick, whisk in 1 tablespoon heavy cream at a time until it reaches a smooth consistency. This mixture will create the signature creamy yet slightly firm texture of classic pumpkin pie.
Taste the filling and adjust sweetness if needed. The spices should be prominent but balanced—you want warmth from the ginger and nutmeg to complement the cinnamon's brightness.
Assemble and Bake the Mini Pies
Preheat your oven to 375°F. Remove the chilled oat crust balls from the refrigerator and place them on the same baking sheet. Press each ball firmly into a 3-inch round using your palm or a small glass, creating a ¼-inch thick crust with slightly raised edges.
Carefully spoon 2 tablespoons of pumpkin filling into the center of each crust. Using a small offset spatula, gently spread the filling to within ¼ inch of the crust edges, leaving room for expansion. This prevents overflow during baking.
Bake to Golden Perfection
Bake the mini pies for 25-30 minutes until the crust edges are deep golden brown and the filling is just set but still slightly jiggly in the center. The filling should pull away from the edges of the crust slightly, indicating it's cooked through.
For the crispiest crust, I recommend broiling for 1-2 minutes at the end of baking time. Watch closely—you want the tops to brown but not burn. Let the pies cool completely on the baking sheet for 1 hour before serving.
The crust should be firm and crisp, while the filling remains creamy with a slight wobble in the center. Serve at room temperature for the best texture contrast between the crisp exterior and velvety interior.
Pro Tips For Making Libby'S Mini Pumpkin Pie
- Whisk Eggs Until Ribbon-Stage: I learned this the hard way—under-whisked eggs make the filling grainy, and that’s the last thing you want in a mini pumpkin pie. Beat those eggs for a solid 2-3 minutes until the mixture holds a slow ribbon when you lift the whisk. No one wants to bite into a texture that feels like oatmeal.
- Toast the Oats First: Skip this, and your crust will taste raw. Lightly toast the rolled oats in a dry skillet over medium heat for 3-4 minutes, stirring constantly, until they’re golden and fragrant. This step makes the crust crispier and deeper in flavor—trust me, your pie will taste like you spent all day baking.
- Don’t Overmix the Filling: Once you fold in the pumpkin, stop stirring the second everything is combined. Overmixing incorporates too much air, which can make the filling sink or develop a weird texture when baking. Just a few gentle folds—like you’re tucking in a blanket—keeps things smooth.
- Chill the Mixture Before Baking: I used to rush straight to the oven, and my pies always ended up dense or uneven. Let the filling sit in the fridge for at least 30 minutes before pouring into the crust. This helps the oats absorb moisture and the eggs set properly—your mini pies will bake up lighter and more consistent.
Troubleshooting your libby's mini pumpkin pie
Soggy Crust Fix
If your crust turns out soggy instead of crisp, the issue is likely excess moisture in the filling or underbaked crust. First, ensure your filling isn't too wet—Libby's pumpkin should be drained thoroughly if it appears particularly moist.
For a second bake, place the cooled pies on a baking sheet and broil for 1-2 minutes at 350°F to restore crispness. I've also found that brushing the crust with 1 tablespoon melted butter before baking creates a better moisture barrier. 🔥
Filling Too Runny
A runny filling usually means the pies weren't baked long enough or the oven temperature fluctuated. Increase baking time by 5-7 minutes and check at 28 minutes—the filling should be just set with a slight jiggle in the center.
For extra insurance, I recommend using 2 extra egg yolks in the filling to help thicken it. If the pies are already baked, chill them for 30 minutes to help the filling firm up naturally.
Uneven Baking
If some pies bake faster than others, it's likely due to uneven heat distribution in your oven. Rotate the baking sheet halfway through baking (after 15 minutes) to ensure even browning.
For convection ovens, reduce temperature by 25°F and bake for 2-3 minutes longer. I also recommend using light-colored baking sheets—dark pans can cause hot spots that overbake certain areas.
Crust Too Crumbly
Over-processed oats or insufficient binding are the usual culprits. For a more cohesive crust, add 1 tablespoon heavy cream to the dough if it feels too dry. Alternatively, replace 2 tablespoons of oats with 2 tablespoons almond flour for extra binding.
Chill the dough for an additional 15 minutes before pressing into crusts—this helps the butter redistribute and creates a more stable structure. 💡
Filling Too Sweet
If your filling tastes overly sweet, the sugar content is likely unbalanced. Reduce granulated sugar to 0.2 cup and add 1 teaspoon pumpkin puree to compensate. For a more natural sweetness, I also recommend using 1 tablespoon maple syrup instead of sugar.
Taste as you go—remember, spices like cinnamon and nutmeg already add depth, so err on the side of less sweetness.
Pies Not Rising
Flat pies usually result from insufficient leavening or under-mixed dough. Ensure your baking powder is fresh—Diamond Crystal works best. For the crust, gently press the dough into the pan rather than packing it down.
If using a gluten-free crust, add 0.5 teaspoon xanthan gum to improve rise. Also, avoid overfilling the crusts—2 tablespoons per pie is ideal for proper expansion. ✨
Nutrition facts
Frequently asked questions
Can I make these mini pumpkin pies without a food processor?
Yes! Instead of processing the oats, simply pulse them in a blender or even grind them coarsely with a rolling pin in a ziplock bag. For an even quicker method, use 1 cup quick oats (not old-fashioned) and pulse until finely ground. The texture won't be identical, but it will still create a sturdy crust. Just be prepared for slightly less crunch.
How do I store and reheat these mini pies?
Store at room temperature in an airtight container for up to 3 days. For longer storage, freeze unbaked pies for 1 month. To reheat, place individual pies on a baking sheet and warm in a 350°F oven for 5-7 minutes until the crust is crisp again. For a quick fix, microwave 10-15 seconds—just know the crust won't be as crispy.
Can I use fresh pumpkin instead of Libby's canned?
Use 1.5 cups cooked fresh pumpkin puree (about 2 cups raw, peeled and cubed). Roast the pumpkin at 400°F for 30 minutes first to concentrate the flavor, then blend until smooth. Fresh pumpkin has more water content, so you may need to reduce the cream by 2 tablespoons to maintain the right consistency.
What's the best way to serve these mini pies?
Serve at room temperature for the perfect texture contrast between the crisp crust and creamy filling. For a festive touch, dust with powdered sugar or add a dollop of whipped cream. They're ideal for holiday gatherings—make a dozen and arrange on a tiered tray with cinnamon sticks for garnish. Pair with a cup of chai tea for the full autumn experience!
Why does my crust crack during baking?
Cracking usually happens when the dough is too dry or the oven temperature fluctuates. First, ensure your butter is cold but workable—not melted. For a more stable crust, add 1 tablespoon heavy cream to the dough if it feels too crumbly. Also, avoid opening the oven door during the first 15 minutes of baking to maintain even heat. If cracks appear, they won't affect flavor!